Package
Your temperature control system is delivered with the following elements:
- 1 TB Net Connect
- 1 Power supply 230/5V
- 1 Thermo Buttons reader
Connect the TB Net Connect
- Connect your TB Net Connect on the power supply.
- Connect your TB Net Connect on your network with the RJ45 cable. If you don’t have network, you can connect the TB Net Connect directly on your computer. In this case, you need a straight cable. You can find it in any IT store.
If you use fixed IP addresses
- Download the program « Microchip Ethernet Discoverer.exe » by clicking this link
- Plug the TB Net Connect directly on the Ethernet port (network socket) of your PC and run the Microchip Ethernet Discoverer program. The TB Net Connect will be automatically detected.
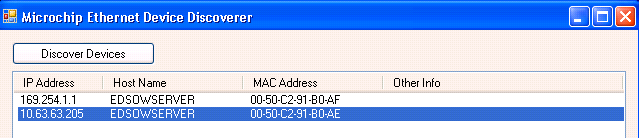
- Read the IP address displayed in the Microchip Ethernet Discoverer window and set your local network connection with a similar address.
Example :- If the address displayed in the window is 192.168.1.10
- Set your PC with an address like 192.168.1.20
- Warning : Before modifying the IP address of your PC, note the address that has been used until now.
- Double click on the TB Net Connect that you want to set up. The following page will be displayed in your Internet browser.
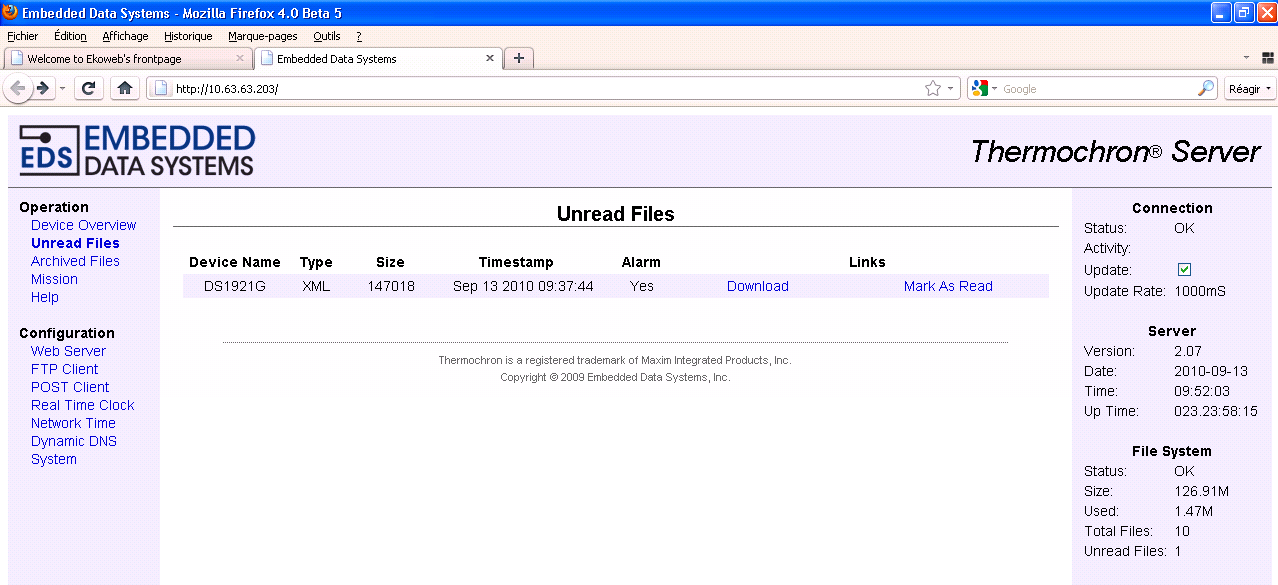
- Use the menu « Web Server ». The login is « admin »; the password is « eds ». After having entered these identification data, the IP address configuration window will be displayed.
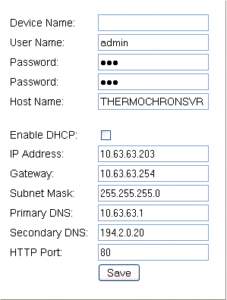
- In the field « Host Name » indicate a name for this TB Net Connect. Example TBNC.
- Untick the box « Enable DHCP ».
- Enter the IP addresses given by your network administrator.
- Click « Save ».
- Connect the TB Net Connect to your network.
- Reset your computer IP address with the address used previously.
- Then, follow the setting instructions.
If you use dynamic IP addresses (DHCP)
- Download the program « Microchip Ethernet Discoverer.exe » by clicking this link.
- Plug the TB Net Connect directly on the Ethernet port (network socket) of your PC and run the Microchip Ethernet Discoverer program. The TB Net Connect will be automatically detected.
- In this window, double click the TB Net Connect to open the configuration page.
- Follow the setting instructions.
Set the TB Net Connect for Thermotrack Online
In the menu situated on the left of the page, choose the option “POST http”. The login is “admin” and password “eds”. The following window will be displayed:
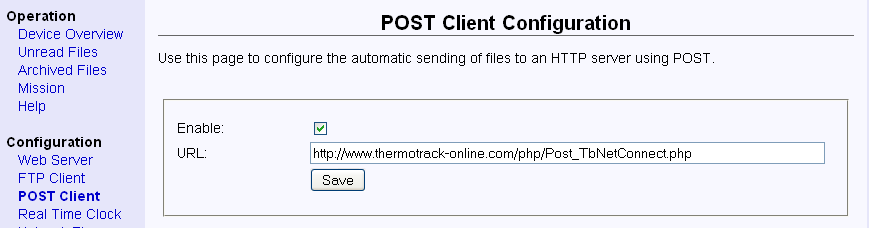
- Tick the box « Enable » and in the URL field enter the following address :
http://www.thermotrack-online.com/php/Post_TbNetConnect.php - Click « Save »
In the menu situated on the left of the page, choose the option “System”. The login is “admin”; the password is “eds”. The following window will be displayed:
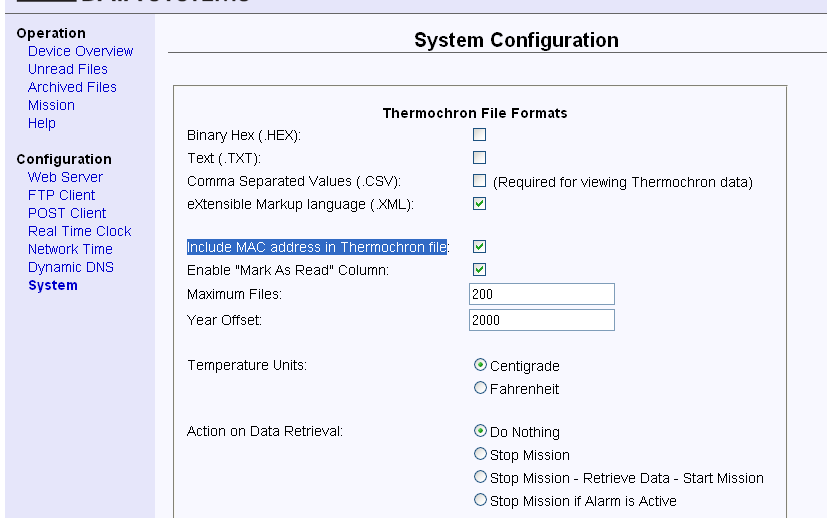
- Tick the box eXtentible Markup Language (.XML)
- tick the box Include MAC address in Thermocron file
- Action on Data Retreival : Choose Do Nothing.
- Click « Save »
Read Thermo Buttons with the TB Net Connect
- Plug the TB net Connect on the power supply. Place the Thermo Button on the reader (which has to be connected on the RJ12 socket of the TB Net Connect).
- The « Download » led indicates that the data are been downloaded.
- The High and low alarm detected LEDs indicate that the Button has registered temperatures above or below the thresholds.
- The “Ready/Download completed » indicate that the download is finished.
- When the TB Net Connect is connected to your Ethernet network, the data are transferred directly to Thermotrack Online.
- In the list of missions of Thermotrack Online, the status of the mission will be “Downloaded” and the name of the user associated to the TB Net Connect (see section “Create users”) is indicated in the field “Downloaded by”.