Preparing a mission consists in entering in the Button the parameters that will be used for the next recording. There are 3 ways of setting up a Button:
- Direct mission
- Mission relaunch
- Mission by profile
Different Button models have different settings. That’s why you must first place the Button on the player during a ‘Direct Mission’.
Direct mission
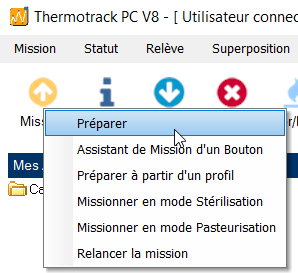
Click on “Mission”, then “Prepare”.
General” tab
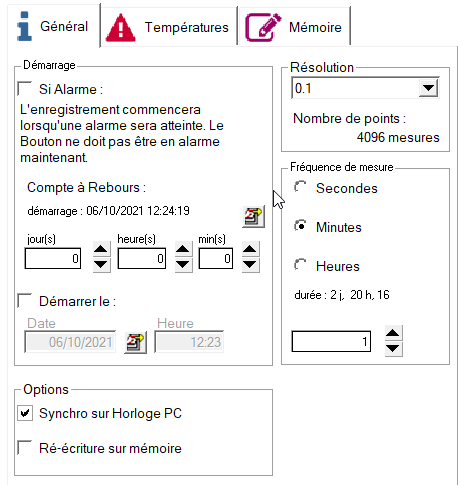
- Start if alarm (except 21G): Your Button can start recording only when the temperature is outside the mini-maximum you have specified with the alarms. This can be combined with the countdown timer.
Please note that your Button must not be in alarm when the mission is programmed or when the countdown timer runs out.
- Countdown: You can prepare a Mission 45 days in advance (99 days for 22L and T). To do this, use the up and down arrows to adjust the days, hours and minutes. You can also click on the calendar to choose the start date.
- Start on : You can choose the date and time you want your Button to start.
- Resolution: this can be 05°C or 0.1°C, depending on the knob model. The higher the resolution, the fewer points can be stored in the Button’s memory. This value is automatically updated when you change the resolution.
- Measurement frequency: Set the frequency at which you wish to measure the temperature. Use the adjustment arrows on the side to increase or decrease the frequency.
- PC clock synchronization: You can adjust the Button’s time to match the time on your PC.
- Rewrite to full memory: The Button can store 2048 measurement points in its electronic memory. Beyond that, you have 2 options:
- You stop the Button mission by answering No. You keep the complete history of values.
- You authorize rewriting on full memory by answering Yes. In this case, the 2049th point will be written over the 1st and so on. In this way, you maintain a moving window whose duration depends on the measurement frequency.
Temperatures” tab
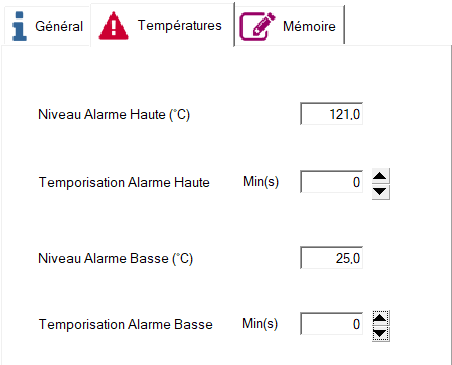
You can define a working range corresponding to the minimum and maximum temperature your product must not exceed. If this is exceeded, the Button will store an Alarm. Enter the values corresponding to the alarm thresholds by entering the values directly. You can also click on the ‘Set’ button to bring up the scrollbars. You can also specify a time delay for these alarms. If you enter a time delay, the alarm will be shown in a different color:
- or YELLOW, if the temperature is outside the limit, but for less than the timer.
- Either RED, if the temperature is outside the limit, and for longer than the time delay.
Memory” tab
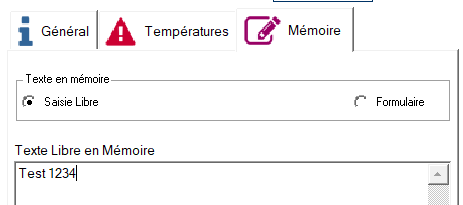
The Button has a memory in which you can store information that will be read, displayed and printed out when you read it. (Batch number, test number, fridge name, etc.). The information you enter in this tab can also be used to automatically create the file name when you read the Button (see paragraph 3.2). You can enter this information in two ways: as “free text” or as a “form”.
- Free text: Enter information directly
- Form: You have two columns, “Variable” and “Value”. Example: Variable column = Vehicle and Value column = Renault
Only the first line will be taken into account when creating the file name.
Caution: If you change a single parameter and press the ‘Mission’ button, all the values in the button’s memory will be permanently deleted. If you wish to keep these values, first perform a ‘Relève’ and then an ‘Archive’.
Restart a mission
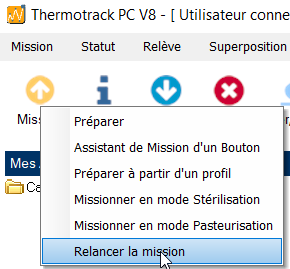
You can restart a Button mission. In this case, you don’t have to re-enter all the settings. Right-click on the ‘Mission’ icon and select ‘relaunch mission’.
Profile-based assignment
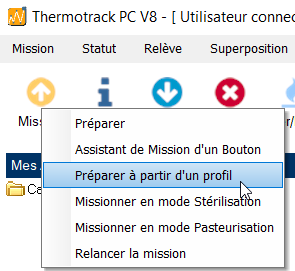
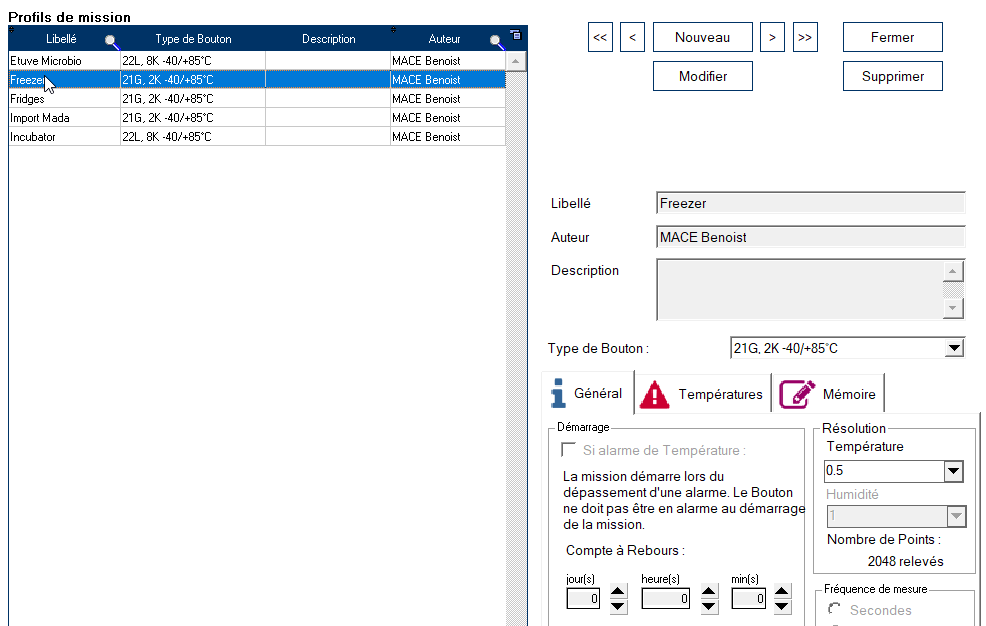
Mission profiles are typical settings you use frequently. They allow you to quickly adjust your Buttons
Once your profile has been created, simply right-click on the ‘Mission’ icon and select ‘Mission from profile’. Then choose a profile from the list, and press the arrow to copy the profile parameters.
Creating a new Profile
Click on the ‘New’ button and enter a profile label (name), an author and a comment Then choose the type of Button to which this profile will be assigned (21G, 22L, 22t, …) This displays the possibilities specific to each Button. In each of the 3 tabs, set the values for each variable (startup type, measurement frequency, alarms, etc.). Click on ‘Save’ when finished.
